Building a timber frame pavilion is quite the undertaking, but you’ll find it’s manageable when you understand each phase. You’ll start with careful planning and design, then move through selecting quality wood, preparing your site, and cutting precise joints. The real magic happens when you assemble everything together and lift the frame into place. Before you discover what transforms a collection of wood pieces into a stunning structure, you need to know where to begin.
Design and Planning: Creating Your Pavilion Blueprint

Before you pick up a single piece of timber, you’ll need to create a detailed blueprint that serves as your building roadmap, because a well-planned design prevents costly mistakes and guarantees your pavilion will be structurally sound and aesthetically pleasing. Start by measuring your intended space and deciding on dimensions that’ll fit your property. Next, sketch the pavilion’s shape, whether rectangular, square, or octagonal, and determine the roof style you prefer. Consider the location of support posts, which typically sit eight to twelve feet apart for stability. You’ll also need to account for local building codes and weather conditions in your area. Finally, calculate the materials you’ll need, including beam sizes, fasteners, and roofing materials, ensuring your design meets safety requirements before construction begins.
Selecting and Sourcing Timber Frame Wood
Once you’ve finalized your pavilion design, the next critical step is choosing the right wood for your project, because the quality and type of timber you select’ll directly impact your structure’s durability, appearance, and overall performance. Consider hardwoods like oak, cedar, or Douglas fir, which offer excellent weather resistance and longevity. Research local suppliers and lumber mills to compare pricing and availability, then inspect samples for grain quality, moisture content, and defects. Verify that your timber meets structural grading standards required for load-bearing applications. Request sustainably harvested options when possible, ensuring environmental responsibility. Calculate your exact quantities by reviewing your blueprints carefully, accounting for waste and future repairs. Establish relationships with reputable suppliers who can deliver consistent quality materials on schedule.
Site Preparation and Foundation Work

As your timber and materials arrive on-site, you’ll need to prepare the ground where your pavilion’ll stand, because a stable foundation is essential for supporting the entire structure safely and preventing settling or shifting over time. You’ll start by clearing the area of vegetation, rocks, and debris, then level the ground using proper grading techniques. Next, you’ll mark out the foundation footprint according to your design plans, ensuring precise measurements and square corners. Depending on your climate and soil conditions, you’ll either dig post holes for concrete footings or pour a concrete slab foundation. These footings must extend below the frost line in cold climates, preventing frost heave damage. Finally, you’ll allow concrete to cure completely before beginning frame assembly.
Cutting and Preparing Timber Joinery
With your foundation fully cured and ready to support the structure, you’ll now move into the critical phase of cutting and preparing the timber joinery, which involves creating the precise joints that’ll hold your pavilion’s frame together securely. You’ll mark each timber according to your detailed plans, identifying where mortises, tenons, and other joints must be cut. Using specialized tools like chisels, saws, and routers, you’ll carefully remove wood to create perfectly fitting joints. Precision’s essential here, since even small errors’ll compromise your frame’s structural integrity. You’ll test-fit each joint repeatedly, making fine adjustments until components align flawlessly. This meticulous preparation guarantees that when you assemble the frame, everything locks together tightly, creating a strong, durable pavilion that’ll withstand years of weather and use.
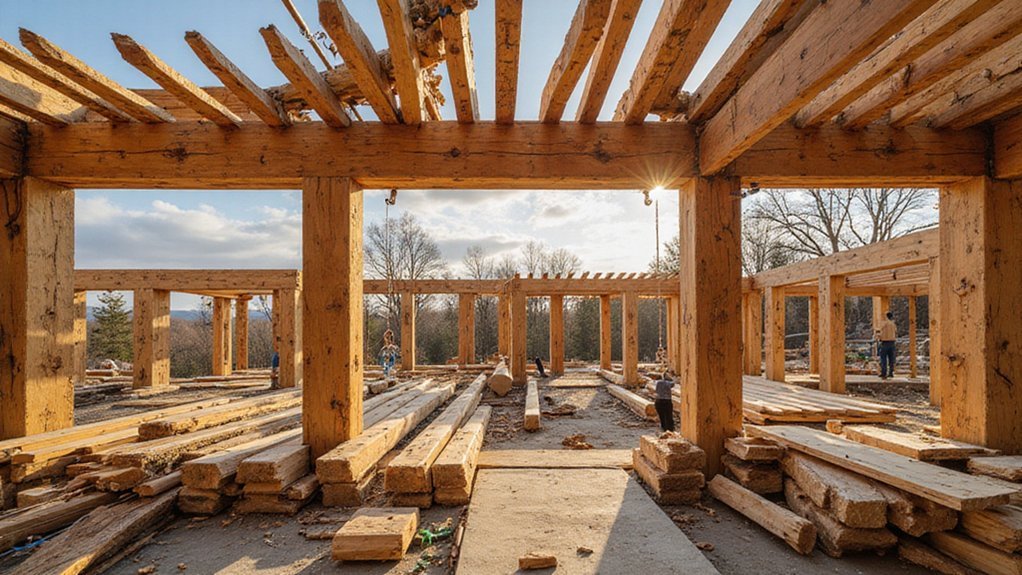
Assembling the Timber Frame on the Ground

Now that you’ve completed all your joinery work and test-fitted each piece, you’re ready to assemble the entire timber frame on the ground before lifting it into place on your foundation. Lay out all components in their correct positions, creating a complete outline of your pavilion’s structure. Begin connecting the major posts and beams using wooden pegs and mortise-and-tenon joints, checking alignment with levels and measuring tools frequently. Work systematically, assembling one section at a time, then connecting sections together. Guarantee all joints fit snugly without forcing, as proper contact is essential for structural integrity. Have helpers available, since manipulating large beams requires multiple people. Once fully assembled and verified square, your frame’s ready for the lifting process.
Raising and Securing the Frame Structure
After your timber frame‘s been fully assembled and squared on the ground, you’ll need to lift it carefully into its final position on your foundation. You’ll use a crane with straps positioned at predetermined lift points to distribute weight evenly and prevent structural damage during the raising process. As the frame rises, spotters guide it into alignment with your foundation’s anchor bolts, ensuring it’s perfectly level and centered. Once positioned, you’ll secure the frame by tightening anchor bolt connections, which lock the structure firmly to the concrete foundation below. This critical step prevents shifting from wind, settling, or seismic activity, creating a stable base for your pavilion’s roof system and any additional structural elements you’ll add later.
Temporary Bracing and Stabilization
Once you’ve tightened those anchor bolts and locked your frame to the foundation, you’ll need to install temporary bracing to keep the structure stable while you continue building. You’ll use diagonal braces, typically made from lumber, to prevent the frame from swaying or shifting during construction. These braces connect corners and key joints, running from the frame down to the ground or to fixed points on the foundation. You’ll secure them with bolts or heavy-duty clamps that you can remove later. Install bracing on multiple sides to distribute forces evenly, ensuring the frame remains plumb and square. Check your work carefully with a level and measuring tape, making adjustments as needed before tightening everything permanently.
Installing the Roof System
With your frame properly braced and stabilized, you’re ready to install the roof system, which’ll protect the entire pavilion from weather and provide structural support for the upper portions of the building. First, you’ll position the roof beams, which run perpendicular to your main timber frame posts, securing them with traditional joinery or modern metal connectors. Next, you’ll install the roof decking, laying boards or plywood across the beams to create a solid surface. After decking installation, you’ll add underlayment, a protective barrier that prevents water penetration while allowing moisture to escape. Finally, you’ll apply your chosen roofing material—whether metal, shingles, or thatch—ensuring proper overlap and secure fastening to withstand wind and heavy precipitation.
Enclosing the Pavilion: Walls, Railings, and Siding
How you’ll enclose your timber frame pavilion depends on its intended use, climate, and aesthetic preferences, but the process generally involves installing walls, railings, and siding to create weather protection and define the interior space. You’ll start by installing vertical wall framing between the timber posts, which provides structural support for your siding materials. Next, you’ll add railings along open sides, ensuring they meet local building codes and safety requirements, typically standing 36 to 42 inches high. Finally, you’ll attach your chosen siding material—whether wood, metal, or composite—securing it firmly to the underlying frame with appropriate fasteners. This systematic approach transforms your open pavilion into a partially or fully enclosed structure that withstands weather while maintaining the visual appeal of the timber frame design.
Staining, Sealing, and Weatherproofing Strategies
To protect your timber frame pavilion from the damaging effects of sun, rain, and temperature changes, you’ll need to apply stains, sealers, and weatherproofing treatments that work together to preserve the wood’s integrity and appearance. Start by cleaning the wood thoroughly, removing dirt and debris that’ll interfere with product absorption. Next, apply a wood stain that matches your desired aesthetic while providing UV protection. Once the stain dries completely, add a clear protective sealer that creates a water-resistant barrier against moisture penetration. Finally, apply a weatherproofing coating specifically designed for exterior wood exposure. You’ll need to reapply these treatments every two to three years, depending on your climate conditions and weather exposure, ensuring your pavilion remains protected and visually appealing for decades.
Conclusion
Your transformed raw materials into a sturdy shelter, yet your work isn’t finished. While the frame stands secure, the roof protects from above, but weatherproofing guards against decay below. You’ve assembled joints with precision, though finishing requires equal care. Staining and sealing aren’t merely aesthetic choices; they’re essential defenses against moisture and rot. Your pavilion now shelters gatherings, standing as a monument to careful planning, meticulous craftsmanship, and thorough maintenance throughout its construction.