A pole barn workshop is something special. It starts as an empty shell full of possibility, and with a little intention, it becomes the space where projects actually come to life.
The best workshops balance comfort and function. Good lighting changes everything. So does having your tools within easy reach instead of buried in a corner.
Think about how you move through the space, where you naturally pause, and what you need close at hand. Storage can go vertical. Workbenches can multitask. Zones can shift based on the season or the project.
There is no perfect formula, only what works for the work you actually do. Start with the basics: power where you need it, air that moves, surfaces that help rather than hinder. Build from there.
Plan Your Electrical Infrastructure First
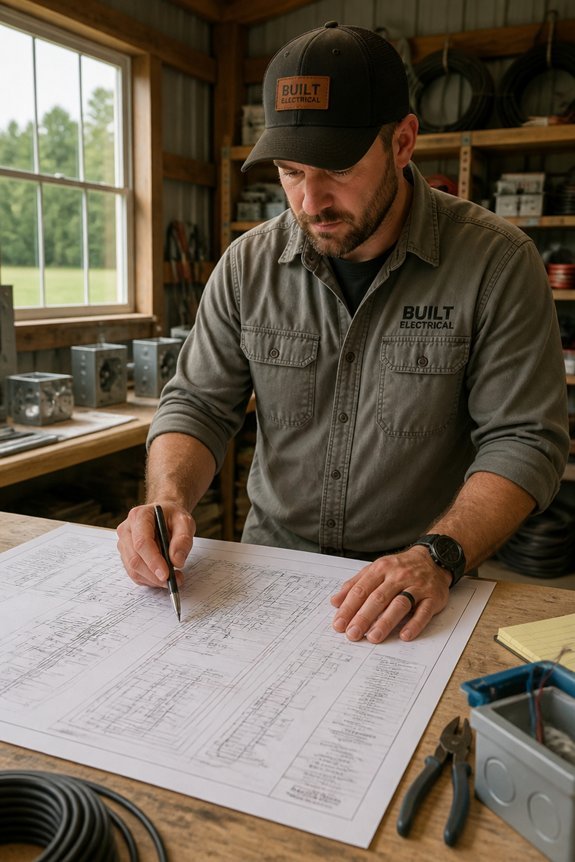
Start with a clear picture of your power needs. Map out where each tool will sit. Calculate total amperage for everything you plan to run.
A 200-amp service handles most workshops comfortably. This covers air compressors, welders, and multiple tools running together. Plan for growth too. You might add equipment later.
Install conduit during framing. This simple step saves major headaches down the road. Retrofitting through finished walls costs far more.
Space outlets every six feet along walls. High-draw equipment needs its own dedicated circuits. This prevents tripped breakers when multiple tools run simultaneously.
GFCI outlets belong everywhere in a workshop. They protect against shock in dusty, damp conditions. Your future self will thank you.
Hire a licensed electrician for the final work. Code compliance keeps you safe and protects your insurance coverage. Professional installation beats DIY shortcuts when it comes to your family’s safety.
Add Proper Lighting to Your Pole Barn Workshop
Start with Overhead Illumination****
LED high-bay fixtures work best for large workshops. Mount them at ceiling height for bright, even coverage. This eliminates dark corners and keeps your whole space usable.
Layer in Task Lighting****
Adjustable desk lamps help with detailed work. Under-cabinet strips light up benches and tool areas. These targeted options reduce eye strain during precision tasks.
Add Smart Features****
Motion-sensor lights in storage areas save energy. They turn on automatically when you enter. You get visibility without hunting for switches.
Bring in Natural Light****
Skylights or translucent panels cut daytime electricity use. They also boost mood and help you see true colors. Position them to avoid harsh glare on work surfaces.
Plan Your Layout
Space fixtures to minimize shadows. Avoid placing lights directly above where you’ll stand. A mix of ambient, task, and accent lighting keeps your workshop safe and productive.
Maintain Stable Temperature and Humidity
Stable conditions protect your tools, materials, and projects from damage. Fluctuating temperatures and humidity cause real problems. Metal rusts. Wood warps. Finishes break down.
Simple equipment solves this. A basic HVAC system, space heater, or dehumidifier keeps conditions steady all year. Insulation and sealed air leaks reduce temperature swings. Check your space with a hygrometer and thermometer. Aim for 50-55% humidity and moderate temperatures. Good ventilation stops moisture buildup and condensation.
These steps extend tool life. They improve your work quality. They make your workshop more functional for every project you take on.
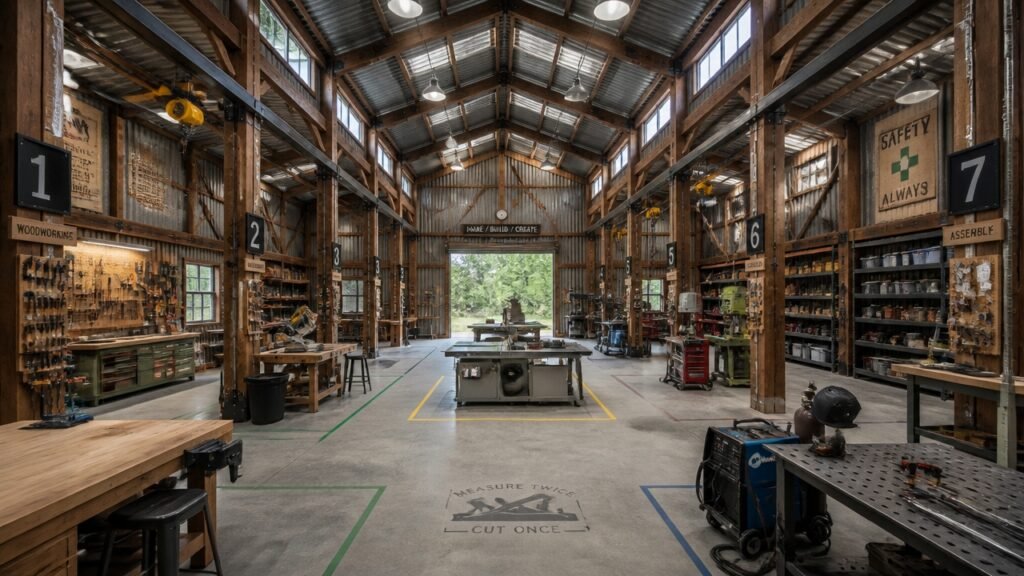
Design Dedicated Work Zones for Different Projects
Zones for Woodworking
Wood dust spreads quickly, so give this area its own corner. Install a dust collection system right at the source. Position table saws and workbenches away from any doors that let in outside moisture. Good lighting helps you spot imperfections in your cuts.
Zones for Metalworking
Sparks and hot metal need special attention. Set up welding equipment against a concrete or fire-resistant wall. Grinders and cutting tools work best on solid, non-flammable flooring. Keep a fire extinguisher within easy reach.
Zones for Storage
Wall shelving keeps supplies visible and off the floor. Pegboards work great for hand tools you grab often. Lockable cabinets protect expensive gear and hazardous materials. Label everything so you can find what you need at a glance.
Zones for Assembly
Large, flat surfaces give you room to spread out parts and plans. Bright, even lighting reduces mistakes and eye strain. Leave enough open floor space to walk around projects in progress.
Connecting Your Zones
Clear pathways between areas prevent trips and collisions. Use concrete in work zones where durability matters. Choose sealed, smoother surfaces in storage areas to protect finishes and small parts.
Build an Efficient Workbench Layout
The workbench is your command center. Its layout shapes both productivity and safety.
Keep tools within arm’s reach. This saves time and prevents accidents.
Vise and Tool Storage
Position your vise at waist height. You’ll work more comfortably this way.
Mount pegboards behind the bench. Frequently used items stay visible and easy to grab.
Heavy Items and Lighting
Store heavy equipment on lower shelves. This keeps everything stable.
Add good lighting overhead or with task lamps. Detail work demands it.
Surface and Supplies
Keep your work surface flat and clear. Designate spots for fasteners, sandpaper, and finishing materials. A streamlined workflow means less clutter.
Maximize Vertical Storage to Free Up Floor Space
Wall-Mounted Solutions
Floor space in a pole barn is precious. Wall-mounted shelving, pegboards, and cabinets keep tools within reach without eating up valuable square footage. Magnetic strips neatly hold metal tools. Hooks handle cords, chains, and hand tools with ease.
Overhead and Corner Options
Ceiling racks suspended from joists store lumber, pipes, and seasonal items up and out of the way. Tall cabinets tucked into corners squeeze every bit of storage from awkward spots. This layered approach keeps your workshop open and navigable.
The Payoff
Vertical storage stops clutter from taking over. It creates clear zones for different tasks and keeps everything moving smoothly.
Organize Tools by Frequency of Use
An efficient workshop starts with smart tool placement. Keep your most-used items right where you need them.
Keep Daily Tools Close
Hammers, screwdrivers, and tape measures should live near your workbench. Place them at arm’s reach so you can grab them without thinking. This simple habit saves time and keeps your momentum going.
Store Sometimes-Used Tools on Middle Shelves
Specialized equipment and seasonal items fit well here. You’ll find them quickly when a project calls for something specific. Middle-height shelving keeps these tools visible but out of your main workspace.
Tuck Rarely Used Tools Away
Upper shelves and back corners work perfectly for items you rarely touch. These spots free up prime real estate for tools you actually use every day.
Adjust as You Go
Start by tracking which tools you reach for most often. Check back every few months as your projects evolve. What felt essential last season might gather dust now. Stay flexible and move things around when your work changes.
—
Benefits of This System
You’ll spend less energy hunting for tools and more time building. Fewer interruptions means better focus and better results. Small adjustments to your layout create a workshop that truly works for you.
Frequently Asked Questions
What Permits or Building Codes Apply to Pole Barn Workshop Construction?
Building permits and codes for pole barn workshops vary by location but typically include zoning restrictions, foundation requirements, electrical safety standards, structural load specifications, and fire safety regulations. Local building departments should be consulted for specific requirements.
How Much Does It Cost to Build and Equip a Pole Barn Workshop?
Pole barn workshop construction costs range from $15,000 to $50,000 for basic structures, depending on size and materials. Equipment expenses vary considerably, typically adding $5,000 to $100,000 based on tools and machinery requirements.
What Safety Equipment Should I Install in My Pole Barn Workshop?
Workshop injuries affect approximately 100,000 people annually. Essential safety equipment includes fire extinguishers, first aid kits, proper ventilation systems, emergency lighting, eye wash stations, and clearly marked emergency exits throughout the facility.
How Do I Prevent Pest and Rodent Infestations in My Pole Barn?
One should seal all gaps and cracks in the structure, maintain cleanliness by removing debris and food sources, install proper ventilation, use rodent traps strategically, and consider professional pest control treatments periodically.
What Insurance Coverage Do I Need for a Pole Barn Workshop?
Like a ship requires multiple anchors against uncertain storms, a pole barn workshop needs general liability, property damage, and equipment coverage. One should also consider workers’ compensation if employing others within the structure.
Conclusion
A workshop owner implemented all seven strategies: electrical outlets on 20-foot intervals, LED panels overhead, climate control, separate zones for woodworking and metalworking, an L-shaped workbench, wall-mounted pegboards, and frequently-used tools at arm’s reach. Within months, project completion time decreased by 30 percent, accidents dropped considerably, and tool retrieval became instantaneous. Strategic planning transforms cluttered spaces into functional environments where productivity and safety coexist efficiently.